The volume of rucksack you need on Elbrus depends on the route. The nine-day programme from the south calls for a 30-40 litre rucksack, the ascent from the north for 50-60 litres, and the expedition route from the west for 70-80 litres. The difference has nothing to do with personal preference and everything to do with how much a participant carries between places to stay. First settle on the exact programme, then buy or hire the rucksack.
Why 30-40 litres is enough for the south
On the south route most of the luggage stays in the valley or at your accommodation, and what goes up is the set you need on the acclimatisation ascents and on summit day. The rucksack has to hold warm layers, water or a vacuum flask, spare gloves, goggles, a personal first-aid kit, a torch, food and the other items on the programme list.
An over-large rucksack carried half empty gives you no useful margin in itself. Things shift about inside, the centre of gravity moves, and the owner is tempted to take more than they need. A model that is too small forces you to strap bulky items to the outside and makes it harder to reach your clothing in the wind.
Why the north and the west need more volume
There is less infrastructure on the north side, so the exact list includes more that the participant carries themselves. The 50-60 litre requirement cannot simply be scaled down to the southern format. The west route uses an expedition set-up with tents, a sleeping mat and a fuller personal kit, which is why the programme specifies 70-80 litres.
This is a good example of why general advice from the internet can turn out to be wrong. The same summit does not mean the same logistics. Before you pack, open the “Equipment” section of the programme you have actually chosen and work from that.
How to check the fit
- The back length matches your height and adjusts without twisting
- The hip belt takes the load on your pelvis rather than hanging on your stomach
- The shoulder straps sit close without painful pressure
- The chest strap restricts neither your breathing nor your arm movement
- The lid closes over a genuinely packed load
- You can reach water, sunglasses and gloves without unpacking everything
Trying a rucksack on empty is almost useless. Put a comparable load inside, add realistic weight, and then walk about for at least half an hour. Try it on stairs, watch how far you lean forward, and walk with poles.
How to pack
Heavy, dense items go closest to your back, soft things fill the gaps, and anything you may need quickly is not buried at the bottom. The vacuum flask should stand upright and not press into your back. The down jacket and spare mitts are protected from moisture in a bag of their own.
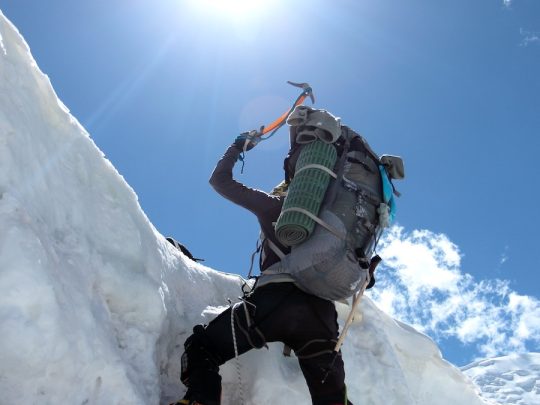
Crampons travel in a protective case: exposed points damage fabric and clothing. The ice axe is attached only by the loops made for it, so that it neither swings about nor catches anyone. Work out how it attaches before the first ascent.
What should not hang on the outside
A collection of bags, bottles and clothing slung outside catches on equipment and swings as you walk. The only things left outside are those the rucksack has a secure attachment for. Everything else should fit inside without being crushed.
If the volume you have chosen will not take the compulsory list, do not try to solve the problem by leaving out warm clothing or safety equipment. Go through the non-essentials first, and then get a rucksack of the size required.
Protection from water and snow
A cover protects the outside of the rucksack but does not make it fully watertight: water can get in from the back panel, through the straps and through an open top. Critical items are packed inside as well, in strong bags or dry bags. One large liner is convenient for the whole volume, several small ones for quick access.
Documents, electronics and spare batteries are packed separately. After a wet day, unload the rucksack completely and dry it somewhere with good ventilation. Damp straps and a damp hip belt cannot be left shut inside a duffel bag until the next morning.
Can the same rucksack be used in other mountains?
A 50-60 litre model often suits trekking where you carry part of your own load, and 70-80 litres suits expedition logistics. But volume on its own does not confirm that a pack is suitable. You have to compare weight, attachments, access, what the tent demands and who carries the main luggage.
If the rucksack is not being bought for Elbrus alone, write out the lists for two or three future trips. A do-it-all model is useful when the requirements genuinely overlap. Buying a large expedition rucksack for a single ascent from the south is usually unnecessary.
Buying or hiring
A rucksack is worth buying after you have tried several models on under load. For a single trip you can hire one from Rock and Rent, confirming the volume and the back length in advance. Go over the rucksack you are given from end to end: zips, buckles, seams, hip belt and attachment points.
The full list of items is collected in the article on equipment for Elbrus. Once the route is chosen, lay the set out on the floor and do a trial pack. That shows whether you need a different volume and which small items still have no permanent home.
Related programmes
The cards show two different formats. Their lists cannot be merged into one universal set.
-
 1,850 $
Climb Elbrus from the North, 10 Days
-
 1,770 $
Climb Elbrus from the South, 9 Days
-
 3,550 $
Climb Elbrus from the West, 11 Days
- Height (m)
- 5642
- Duration
- 11 días
- Difficulty
- Average
- Continent
- Europe
- Children
- Not suitable for children
- Accommodation
- Some nights in tents
In summary
What Elbrus calls for is not the biggest rucksack but the one that matches the exact route and sits properly under load. Settle the programme, gather the compulsory items, do a trial pack, and only then agree the set with Mountain Guide by telephone +7(988)382-98-44.
The overview of Mountain Guide tours in Nepal helps you compare what different routes ask in terms of rucksack, altitude and the format of support. The main article on the subject.
Putting your kit together? Open the full contents page for mountain equipment: clothing, footwear, technical items, hire and route-by-route lists.