Preparing for a ski tour on southern Elbrus combines three tasks: a high-altitude ascent, independent travel on skis and glacier work. This is not classic Elbrus with skis added for appearances, nor a place to encounter climbing skins for the first time. Before the trip, a participant must be able to climb confidently, perform kick turns, control an off-piste descent and use an individual avalanche kit.
The central feature of a high-altitude ski tour is the constant change in conditions. Neither the summit nor a complete ascent and descent on skis is guaranteed. Snow may allow travel on skins lower down, require ski crampons higher up and turn into hard ice where mountaineering crampons, an ice axe and a rope team are necessary. Good preparation means not trying to remain on skis at any cost, but being able to change quickly and calmly to the safer mode of travel.
Preparing for an Elbrus Ski Tour: Required Experience
Confident resort skiing is a useful foundation but does not cover every ski-touring task. On a prepared piste, a lift provides the ascent, the snow is familiar and fatigue can end in a café. On Elbrus, a participant gains elevation independently, carries a rucksack, changes binding modes and must retain sufficient precision for the descent after several hours of work.
Before booking, practical experience from several ski-touring outings is required, not a single training hour. A participant should be able to:
- Climb smoothly and efficiently on skins
- Perform kick turns on a slope without losing balance
- Choose a safe place to stop and change modes
- Remove and attach skins quickly
- Use ski crampons
- Control speed on hard, broken and variable snow
- Descend with a rucksack while retaining an energy reserve
- Use an avalanche transceiver, probe and shovel
A controlled descent is particularly important. Someone may have strong endurance and climb quickly yet handle skis poorly on an uneven surface. At altitude, fatigue, cold and heavy clothing amplify this weakness. The objective is not elegant technique but the ability to stop where the guide requires and pass a section safely without falling.
If kick turns, mode changes or an avalanche search still require constant prompts from an instructor, a separate training trip at lower altitude should come first. The programme’s acclimatisation days are for adapting the body and becoming familiar with the specific slope, not learning the whole of ski touring from the beginning.
Why Skis May Give Way to Crampons
At high altitude, the snow surface changes with wind, temperature and time of day. A slope may be hard after a cold night, soften later in the sun and become icy again on wind-scoured sections. The same calendar date does not create the same route.
A participant needs to distinguish three modes. Skins provide grip on suitable snow. Ski crampons help the binding hold on a hard slope but do not replace mountaineering crampons. When climbing on skis becomes unsafe or inefficient, the skis are attached to the rucksack and travel continues in crampons with an ice axe and harness on the guide’s instruction.
A transition takes time and demands care. Wind can easily carry away a glove or skin, snow enters the binding, and a tired person forgets to close a buckle or put away a component. Mode changes should therefore be practised in advance with the same gloves and rucksack that will be used on the mountain.
The descent may also begin below the summit. The guide assesses visibility and the condition of the snow, glacier and group, then selects the point at which skis genuinely improve safety. Completing part of the route in crampons does not mean that the ski tour ‘did not happen’. It shows that the mode of travel answers to the actual mountain rather than an advertising promise.
Everyone Needs an Avalanche Kit
An avalanche transceiver, probe and shovel form one individual kit. Avalanche.org and Avalanche Canada state that every group member in avalanche terrain should carry all three items. A single transceiver or one shovel ‘for everyone’ does not solve the problem if its owner is the person buried.
The transceiver should be worn on the body in transmit mode, with the probe and shovel in an accessible place inside the rucksack. A group transceiver check is conducted before departure. Electronic devices and metal objects can cause interference, so participants need to know their device manufacturer’s recommendations in advance rather than experiment with placement on the route.
Owning equipment without the skill to use it creates a false sense of readiness. A participant should be able to switch rapidly to search mode, complete the three phases of a signal search, probe accurately and dig efficiently. These actions require practice under an instructor’s supervision and regular repetition. Avalanche Canada also emphasises field training, route planning, recognition of avalanche terrain and companion rescue.
Before the trip, it is useful to train with the complete group: hide a transceiver, conduct the search, assemble the probe and begin shovelling while wearing gloves and a rucksack. The objective is not a paper certificate, but actions that do not disintegrate under stress.
What to Check in the Ski Setup
Skis, bindings, boots, skins, ski crampons and mountaineering crampons must form one compatible system. Checking each item separately does not solve the problem. A boot may fit the binding but sit poorly in the crampon; a ski crampon may be the wrong width; a skin may lose adhesion in the cold.
Assemble the complete setup before the trip and check:
- Binding operation in touring and downhill modes
- Boot retention and the condition of every buckle
- Skin size and adhesion
- Ski-crampon width and installation
- Boot compatibility with mountaineering crampons
- Secure attachment of skis to the rucksack
- Access to the avalanche kit without completely unpacking the rucksack
- Operation of the head torch and spare batteries
- The contents of the repair kit
Petzl notes that the crampon binding type must match the shape and welts of the particular boot. Compatibility is checked with every pair before departure: the boot must not shift upwards, sideways or lengthways. Wear also changes a boot’s fit, so a successful fitting in the past does not replace a new check.
Boots need to be broken in. During a ski tour, participants not only descend in them, but also walk for hours in touring mode, stand during transitions and, when necessary, travel in crampons. Minor pressure in a shop can become pain and loss of control after a long ascent.
A full dress rehearsal of the entire setup is useful. Pack the rucksack to the same weight, put on the base and outer layers, complete a long ascent, make several transitions and descend on different snow. On returning, note what became wet, rubbed, was inaccessible or did not fit. This training reveals more than rereading an equipment list.
The independent Rock’N’Rent hire shop allows avalanche equipment to be reserved in advance. Ski-touring skis, boots, bindings, skins and ski crampons are not available for hire. Participants bring their own complete compatible ski setup and confirm the specific avalanche-equipment model and its availability before travelling.
Glacier Travel and Mode Changes
An Elbrus ski tour crosses not only snowy slopes but also a glacial zone. Skis distribute weight over the surface but do not eliminate crevasses or weak snow bridges. The guide decides where participants travel independently, where they increase spacing and where they rope together.
The personal kit includes a harness, carabiners, slings or accessory cord and other equipment from the programme list. Mountain Guide provides group ropes, ice screws, communication equipment and emergency gear. Participants do not need to choose a rescue system independently in place of the guides, but they must be able to put on their own harness correctly and follow instructions while wearing gloves.
Petzl’s guidance on glacier travel on skis emphasises that crevasse-rescue equipment is useful only when paired with techniques practised in advance. Online material helps explain the scope of the task but does not replace practical training.
Practise attaching skis to the rucksack and putting on crampons separately. On the route, this transition may take place in wind and on a confined platform. The less time a group spends searching for a strap or working out where to place a boot, the less it chills and the more accurately it maintains the schedule.
How to Prepare Physically
Physical preparation is not about setting an ascent record. Its purpose is to move at a steady pace for many hours while preserving coordination for the descent. At altitude, trying to catch a stronger participant with short bursts quickly causes overload, while fatigue makes technical errors more likely.
Preparation is best built from several components:
- Long aerobic work at conversational intensity
- Regular elevation gain on foot or skis
- Strength exercises for the legs and core
- Balance and control of movement on one leg
- Ski-touring days with the actual rucksack
- Two consecutive long active days
- Practising mode changes while fatigued
One long outing usually provides more specific information than a short, intense gym session. It shows whether boots rub, food and water are sufficient, skins hold and technique survives after several hours. Duration should nevertheless be increased gradually and with regard to health.
Nutrition and drinking while moving should be practised separately. A person notices thirst later in the cold, while a long food stop chills the group quickly. A practical system enables regular small portions and drinking without unpacking the whole rucksack. Everyone should select a tolerable diet in advance rather than for the first time in the hut.
Consistency matters more than rare feats. Several months of regular work are more useful than trying to gain fitness abruptly in two weeks. A general programme for preparing for the high-altitude section is available in Preparing for Elbrus. Ski technique, avalanche practice and work with one’s own setup must be added.
Good fitness does not replace acclimatisation. An athletic person may move quickly lower down and still tolerate altitude poorly. The UIAA Medical Commission treats primary prevention as the main protection: a conservative ascent profile, adequate hydration and food, and early recognition and management of medical problems both before and during the trip. Chronic conditions and doubts about the acceptability of exertion should be discussed with a doctor before the trip.
When Do Ski Tours Take Place?
The ski-touring programme is associated with spring snow cover, but a date does not guarantee a particular quality of snow. One slope may have soft spring snow, while another has wind crust, recent accumulations or ice. Temperature, wind and recent precipitation matter more than a photograph in last year’s report for the same dates.
Conditions also change over a single day. An early start may make use of a more stable surface, while snow higher up remains hard. Later, sunshine softens the slope while increasing other risks. The guide selects the start and turnaround times according to actual conditions.
This is why the programme does not promise an uninterrupted descent from the summit. Sometimes skis are used over most of the route, sometimes only below a particular elevation, and sometimes the safe option requires a complete transition to mountaineering technique. The participant is purchasing a professionally organised high-altitude ski tour, not a guaranteed ski track from the summit to the cable car.
Checklist Before Booking
It is useful to complete a short check before paying. If any answer is uncertain, this is not a reason to conceal the gap, but a task for separate preparation:
- Do you have recent independent ski-touring experience?
- Can you perform kick turns confidently on a slope?
- Can you retain control on variable snow with a rucksack?
- Have you completed practical avalanche training?
- Have the boots, bindings, ski crampons and crampons been checked together?
- Have the boots been broken in on a long outing?
- Does the insurance cover ski mountaineering and the stated elevation?
- Do you have a physical base for several consecutive active days?
- Do you accept the possibility of turning around and changing from skis to crampons?
Send the manager a specific list of recent routes, including duration, elevation gain, snow type and degree of independence. The phrase ‘I ski confidently’ is too vague. A detailed description allows the guide to assess the programme fit more accurately and identify a skill that needs improvement.
Facts about avalanche kits, field training, crampon compatibility and glacier equipment were checked on 27 July 2026 against materials from Avalanche.org, Avalanche Canada and Petzl. These sources explain general principles; the Mountain Guide programme and guide determine the final list and movement tactics.
Choose a Ski Tour
Below are programmes on Elbrus, Kazbek and both summits in one trip. All require previous ski-touring experience but differ in duration, logistics, living conditions and high-altitude exposure.
-
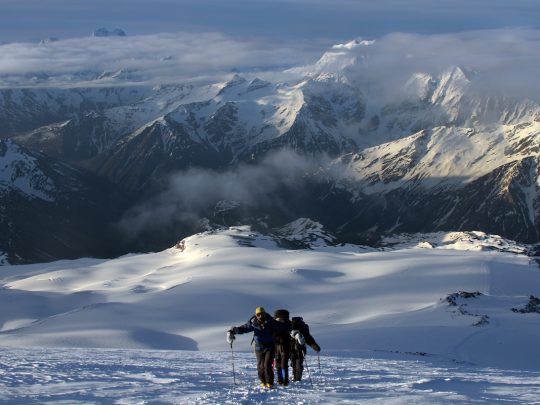 2,100 $
Ski Touring on Elbrus from the South, 9 Days
-
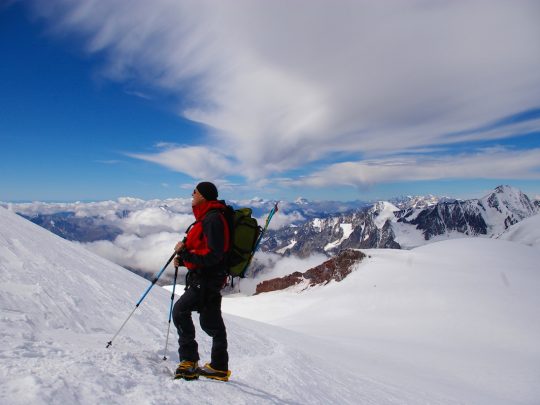 1,900 $
Ski Touring on Kazbek and Elbrus, 9 Days
-
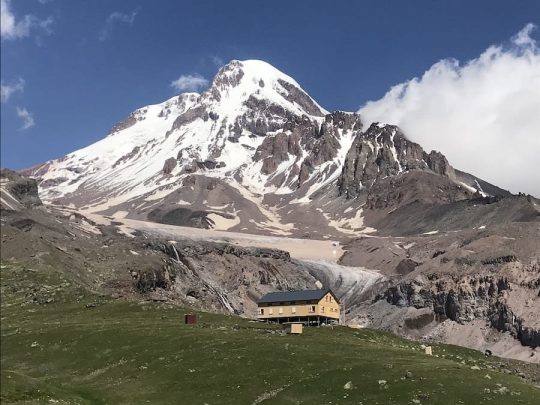 1,600 $
Ski Touring on Kazbek from the South, 7 Days
- Height (m)
- 5642
- Duration
- 8 days
- Difficulty
- Moderate
- Continent
- Europe
- Children
- Not suitable for children
- Accommodation
- No nights in tents
Conclusion
Readiness for an Elbrus ski tour is defined not by a desire to ski from the summit, but by a stable system of skills. The participant climbs efficiently, controls the skis on difficult snow, can change to crampons, knows their avalanche kit and retains precision after a long day. The more honestly this readiness is tested in advance, the more room the trip leaves for the journey itself rather than urgent correction of mistakes.
Send a description of recent ski tours and an equipment list so the guide can assess your fit for the programme.